Achieving consistent plant health in an office environment often hinges on managing soil moisture levels. Because office plants exist in controlled climates with artificial lighting and HVAC systems, they do not always follow the natural drying cycles of outdoor garden plants. A moisture meter is a practical tool for office managers to bridge the gap between visual inspection and actual root-zone hydration. However, the device is only as reliable as the user. The primary challenge lies in the watering meter placement technique for accurate readings, as the probe must interact with the soil in a way that reflects the true status of the root ball rather than just the surface layer.
Most analog moisture meters rely on a galvanic reaction between two metal electrodes at the tip of the probe. When inserted into moist soil, the soil acts as an electrolyte, creating a small electrical current that the meter translates into a reading. If the probe is placed too shallow, it only measures the moisture of the top dressing or the top inch of soil, which typically dries out much faster than the root zone. Conversely, placing the probe too close to the container wall can lead to false readings caused by air pockets or the accumulation of minerals from irrigation water.
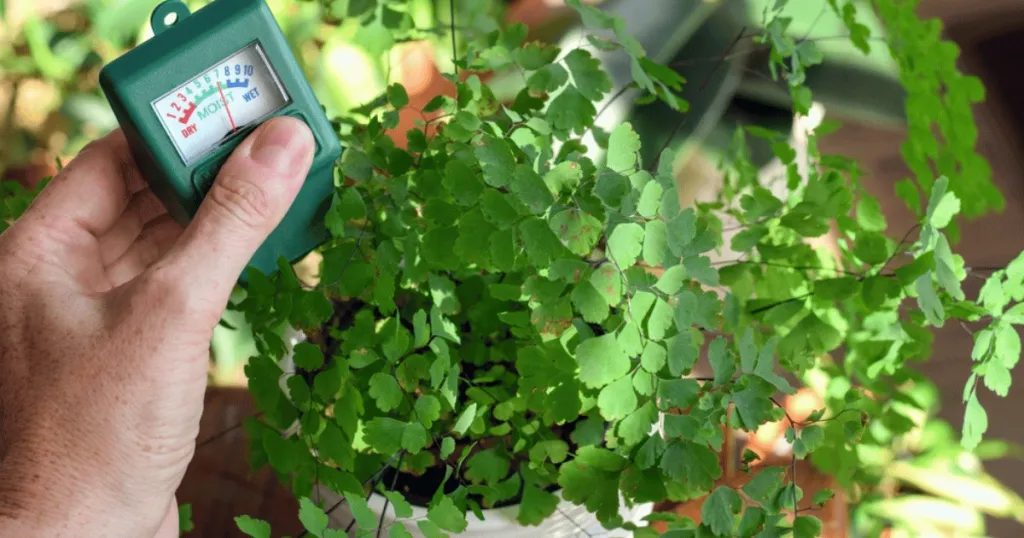
Strategic Placement for Precise Data
To obtain a reliable measurement, you must place the probe in the active root zone. For most office plants in standard containers, this means inserting the probe approximately halfway between the edge of the pot and the base of the plant stem. This area is where the majority of fine, water-absorbing roots are located. Inserting the probe directly against the stem can damage the root system, while placing it too close to the edge of the pot often results in readings that reflect the dry soil near the container walls rather than the moisture content around the root ball.
Depth is equally critical. For a standard six-inch pot, the probe should be inserted roughly three to four inches deep. If you are managing larger floor plants in ten-inch pots or larger, you should aim for a depth of five to six inches. The goal is to reach the middle of the root mass. If the meter shows a dry reading but the plant looks healthy, perform a secondary check by moving the probe one inch to the side. Sometimes, a single reading can be skewed by a large piece of perlite or a pocket of organic matter that is not representative of the entire pot.
Managing Soil Composition Variables
Office plants are often potted in peat-based or coir-based mixes that behave differently than native garden soil. These lightweight, porous media can create air gaps if the plant was not potted firmly. If your meter consistently shows a dry reading despite recent watering, the probe might be sitting in an air pocket. Always ensure the soil is pressed firmly against the probe after insertion. If the meter remains unresponsive, gently wiggle the probe to ensure it is in full contact with the soil particles.
Another factor to consider is the presence of fertilizer salts. In office settings, plants are often fed with liquid fertilizers. Over time, these salts accumulate in the soil. Because salts conduct electricity, they can sometimes cause a moisture meter to register a higher moisture level than actually exists. If you suspect salt buildup, flush the soil with distilled water and wait an hour before taking a new reading. This reset ensures that your next measurement is based on water content rather than mineral conductivity.
Advanced Considerations for Office Environments
In the professional workplace, environmental variables such as proximity to air vents or windows significantly impact how quickly soil dries. A plant located directly under an HVAC vent will experience higher rates of evaporation, causing the top layer of soil to feel dry while the bottom remains saturated. When using your watering meter, it is essential to account for these microclimates. If you notice a discrepancy between the top and bottom of the pot, the watering meter placement technique must prioritize the root zone depth. By inserting the probe deeper, you avoid the trap of surface-level dehydration, which often leads to overwatering and subsequent root rot.
Furthermore, consider the physical state of the potting medium. Compacted soil, common in older office plants that haven’t been repotted, can restrict water movement. In such cases, the meter might show a dry reading even if the soil is damp, simply because the probe cannot penetrate the dense mass. If you encounter significant resistance, do not force the probe. Instead, use a wooden skewer to create a pilot hole, then insert the meter. This preserves the integrity of the sensor tips and ensures better contact with the soil particles, leading to improved measurement reliability.
Practical Guidance for Office Maintenance
In the context of an open office or a reception area, consistency is the key to plant longevity. We recommend establishing a weekly schedule for checking moisture levels, but the actual watering should only occur when the meter indicates the specific threshold for that plant species. For instance, tropical foliage plants like Philodendrons generally prefer to be watered when the meter reads in the lower end of the moist range, while succulents require the meter to show a dry reading before you add more water. A common mistake is to water all office plants on the same day regardless of their individual moisture status.
When using your watering meter, keep a log or a simple checklist for each plant. If you notice a plant consistently requiring water more frequently than others, it may be positioned too close to a heating vent or a high-traffic area with significant air movement. These environmental factors accelerate evaporation. By tracking the readings over a few weeks, you can identify which plants need to be moved to a more stable location or which ones require a larger pot to hold more moisture. This proactive approach prevents the stress cycles caused by alternating between bone-dry soil and waterlogged conditions, which are the most common causes of root rot in office environments.
Finally, remember that the probe itself requires maintenance. After every use, wipe the metal tips with a clean, dry cloth. Soil particles and mineral deposits can build up on the surface of the electrodes, which will lead to inaccurate readings over time. If the meter seems to be failing, a quick cleaning with a fine-grit sandpaper can remove oxidation and restore the sensitivity of the sensors. Treat your moisture meter as a precision instrument rather than a disposable tool, and it will serve as a reliable guide for your office plant care routine.
Optimizing Sensor Calibration and Interpretation
While most consumer-grade meters do not require formal calibration, understanding the baseline behavior of your specific device is vital. Before using a meter on your office plants, test it in a glass of water to ensure it registers at the maximum level. Then, test it in a pot of dry, unpotted potting mix to confirm it registers at the minimum level. This simple verification step confirms that the galvanic reaction is functioning correctly. If the meter fails to move in these controlled tests, the internal wiring or the electrode coating may be compromised, indicating that the device needs replacement.
Interpreting the data requires a nuanced understanding of your plant’s needs. A reading of “moist” is not a universal green light for watering. For many office plants, the goal is to allow the soil to dry out partially to encourage root respiration. If your meter consistently shows “wet” or “moist” for weeks, it is a strong indicator that the pot lacks adequate drainage or that the soil is too dense. In such cases, the watering meter serves as a diagnostic tool for container plant maintenance, alerting you to potential issues with the potting environment before the plant shows visible signs of distress like yellowing leaves or drooping stems.
FAQ
Why does my moisture meter give different readings in the same pot?
Variations in readings often occur because soil moisture is rarely uniform throughout the entire container. Factors such as root density, the presence of large bark chips, or air pockets can cause the meter to report different levels depending on exactly where the probe is inserted. For the most accurate result, take the average of two or three readings taken at different points around the root zone, avoiding the immediate area near the stem.
Should I leave the moisture meter in the soil permanently?
No, it is not recommended to leave the meter in the soil permanently. Most consumer-grade moisture meters are designed for intermittent use. Leaving the probe in the soil for extended periods can lead to corrosion of the metal tips due to constant exposure to moisture and fertilizer salts, which will eventually render the device inaccurate. Always remove the probe, clean it, and store it in a dry place after you have finished checking your plants.
Can I use the same watering meter placement technique for all plant types?
While the core principle of reaching the root zone remains the same, the target moisture threshold varies by species. For example, a Peace Lily needs to be watered when the meter shows the soil is just beginning to dry, whereas a Snake Plant or ZZ plant should be allowed to reach the dry zone on the meter. Use the meter to identify the moisture level, but always cross-reference that data with the specific water requirements of the plant variety you are caring for.